How to Do Doll Lashes: Mapping, Technique, and Aftercare Guide
How to Do Doll Lashes: Mapping, Technique, and Aftercare Guide…
How to Do Doll Lashes: Mapping, Technique, and Aftercare Guide
If you spend any time on TikTok or Pinterest lately, you have probably seen the doll lash look popping up everywhere. Doll lashes are playful, flirty, and make the eyes look instantly bigger. They are the perfect in-between for someone who wants a little drama but does not want to go as heavy as mega volume. If you are a lash artist, learning how to create this trending style is not just a fun skill to add to your portfolio, it is also a way to attract new clients who are searching for this exact look.
In this guide I am going to walk you through everything you need to know about doll lashes. We will cover what makes them unique, how to map the eye properly, the right techniques for application, and the best aftercare advice you can pass on to your clients. Think of this as your go-to playbook so you can confidently create a perfect doll lash set every time.
What Are Doll Lashes and Why Are They Trending
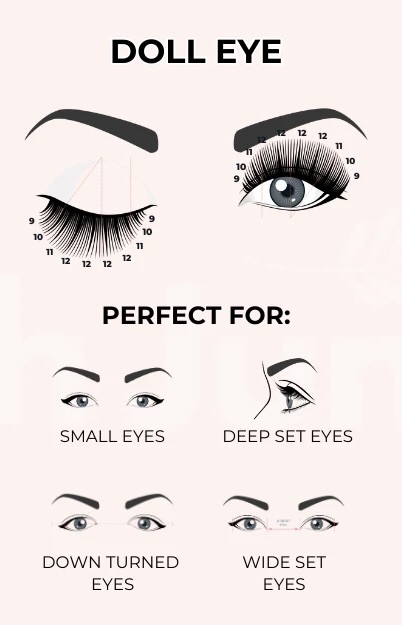
Doll lashes get their name because they mimic the wide-eyed, innocent appearance of a doll. The style is known for its spikes and segments that create an open eye effect. Instead of a uniform lash line, you see little peaks of longer extensions placed strategically between shorter ones. This gives the eye more dimension and makes it appear larger and rounder.
Clients love doll lashes because they are versatile. You can keep them soft and subtle or go full glam depending on the length and volume fans you use. They work beautifully for special events like weddings and vacations but are also wearable for everyday life.
The reason they are everywhere right now is because they photograph so well. Doll lashes catch the light and add that extra texture in photos and videos. With the rise of content creation, women want lash looks that stand out on camera without needing heavy eyeliner or dramatic makeup.
Who Do Doll Lashes Suit Best
One of the most important things to understand before mapping any lash style is how it will complement different eye shapes. Doll lashes tend to suit people who want their eyes to look more open, awake, and youthful.
- Round eyes: Doll lashes can exaggerate the roundness, which can look very cute and playful if that is the client’s goal.
- Almond eyes: This style makes almond eyes appear bigger and more doll-like without losing their natural elegance.
- Hooded eyes: Doll lashes can help lift the lid and create the illusion of a larger eye space, but they must be mapped carefully to avoid looking heavy.
- Downturned eyes: With proper placement, doll lashes can balance the outer corners and prevent the eyes from looking tired.
The only time you may want to avoid doll lashes is when the client already has very protruding or very round eyes and wants them to look more elongated. In those cases a cat eye or fox eye may be a better option.
Lash Mapping for Doll Lashes
Mapping is where the magic happens. Without a thoughtful map, the set will not have the spiky definition that makes doll lashes so unique.
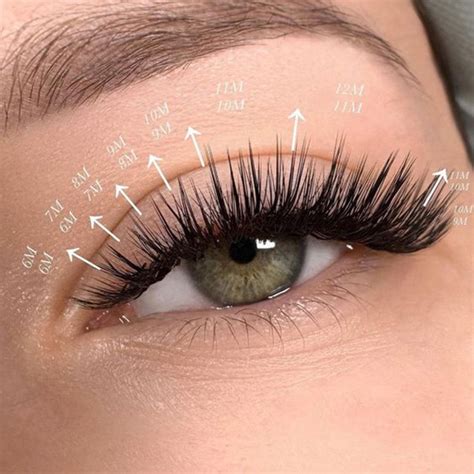
Here is a breakdown of how to create a classic doll lash map:
- Inner corners: Start shorter, usually 8 to 9 mm depending on the client’s natural lashes. You want a soft beginning so the spikes look intentional, not messy.
- Transition zone: Gradually increase the length to 10 or 11 mm. This smooth transition is important so the spikes do not look disconnected from the rest of the set.
- Main spikes: Place your longest lengths (12 to 14 mm) in the center of the lash line. These are the focal point of the doll eye look. Think of them as little peaks rising from the base.
- Secondary spikes: Scatter slightly shorter spikes (11 to 12 mm) between the longest ones to add texture.
- Outer corners: Taper back down to 9 or 10 mm so the eye maintains a balanced, round appearance rather than pulling outwards.
The goal is not to have every lash the same length. Instead, it is about layering different lengths in a way that creates contrast. Use colored markers on your under-eye pad or tape to mark the placement before you start. This will keep your design consistent and prevent you from losing track as you work.
Choosing the Right Lashes and Tools
Doll lashes require the right materials to hold their shape. Here is what to consider:
- Curl: D curl or CC curl is most common for doll lashes. The strong upward curl enhances the wide-eyed effect.
- Diameter: For classics, stay around 0.15 to 0.18 mm. For volume fans, choose 0.05 to 0.07 mm. This allows you to build density without damaging natural lashes.
- Length: The key is contrast. Do not go too long on every lash. Your spikes should stand out because the surrounding lashes are shorter.
- Fans: Use narrow fans for spikes and wider fans for the filler lashes in between. This balance creates texture.
Make sure you are using tweezers that allow for precision isolation. The spikes need to be placed cleanly and upright to keep the design intentional.
Step by Step Technique
Now let’s get into the application process.
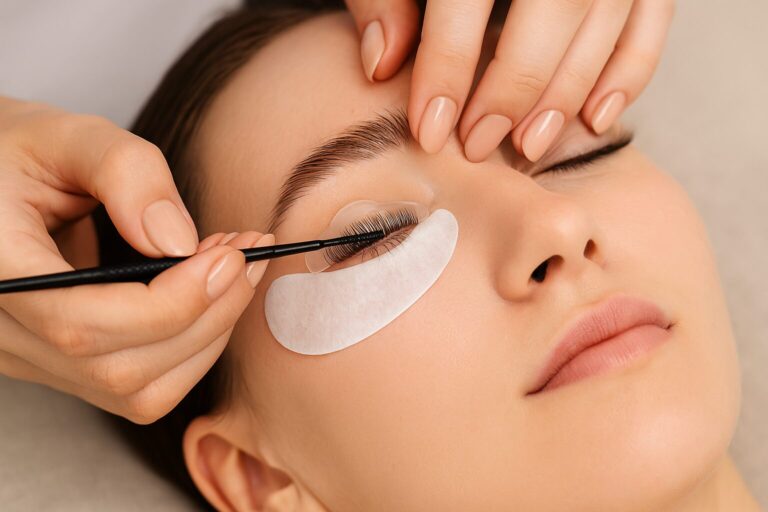
- Consult and Prep
Always start with a consultation to confirm the client’s goals and comfort level with the doll lash look. Cleanse the natural lashes thoroughly and apply under-eye pads or tape. Mark your lash map clearly. - Build Your Spikes First
Many lash artists find it easiest to place the spikes before filling in the rest. Isolate one natural lash and place a closed fan or single extension that is one to two millimeters longer than the surrounding lashes. Repeat this across the middle zone of the lash line according to your map. - Fill the Transitions
Once the spikes are in, go back and fill the lashes around them with shorter lengths. This creates the contrast that defines the look. - Balance the Corners
Keep the inner and outer corners shorter to frame the eye. Do not be tempted to elongate the outer corners because that will change the design into more of a cat eye. - Check Symmetry
Step back frequently and look at both eyes together. Doll lashes should look balanced, not lopsided or uneven. Adjust as needed. - Finishing Touches
Use a lash brush to gently separate and fluff. If needed, pinch spikes together with tweezers for a sharper look. Apply a sealant if you prefer to lock in retention.
Common Mistakes to Avoid
Even experienced lash artists can run into challenges with doll lashes. Here are the most common mistakes and how to avoid them:
- Overusing long lengths: If too many lashes are long, the effect looks messy rather than spiky. Keep the longest lengths only for the spikes.
- Skipping the map: Without a map, the design can lose its shape and end up looking like a random wet set. Always mark your plan before starting.
- Poor isolation: If spikes stick together with surrounding lashes, the set will not last and the look will be uneven. Take your time isolating.
- Wrong curl choice: A curl that is too soft will not create the wide-eyed effect. Use curls with lift for the best results.
Aftercare for Doll Lashes
Once the set is complete, it is just as important to educate your client on proper aftercare. Doll lashes can last beautifully if treated right.
- First 24 hours: Avoid water, steam, and heavy sweating while the adhesive cures.
- Cleansing: Use a lash cleanser two to three times per week. Remind clients that cleansing actually helps retention by preventing buildup.
- Brushing: Encourage them to brush their lashes daily with a clean spoolie to keep spikes defined and neat.
- Sleeping position: Sleeping on the stomach or side can crush spikes. Suggest a silk pillowcase and trying to sleep on the back.
- Avoid oils: Oil-based skincare and makeup removers can weaken the adhesive.
- Regular fills: For best results, recommend fills every two to three weeks to maintain the structure of the spikes.
Why Doll Lashes Are Great for Building Your Lash Business
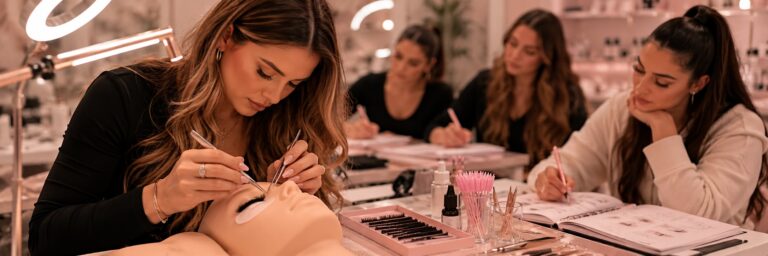
Offering doll lashes can set your services apart in a competitive market. Clients are actively searching for this look on social media, which makes it a great keyword for your marketing. Posting before and after photos, time lapse videos of the application, and lash maps on Pinterest or TikTok can attract new clients and even students who want to learn the style.
Final Thoughts
Doll lashes are more than just a passing trend. They highlight the artistry of lash design because they require precision, planning, and creativity. When done well, they create a striking yet wearable look that clients love to show off online.
If you are a lash artist or student, mastering doll lashes is worth the effort. From mapping to application to aftercare, every step matters. The more you practice, the more confident you will become, and soon this style will be a staple in your portfolio.
Remember, clients are not just looking for lashes, they are looking for an experience. When you can deliver a trendy style like doll lashes with professionalism and care, you position yourself as an expert who is both creative and trustworthy.